Showing posts with label Eco-friendly. Show all posts

Tuesday, 15 July 2014

DIY: Recycle Paper Bags to Create Colourful Luminaries

Hello! Hope you all are in the best of spirits!
I came across a couple of tutorials I've done in the last few months mainly done for a local daily. Just didn't have the time to share them with you people. So for sometime now on, I'll be filling up my blog with these DIYs & Projects. The coming weeks will see a lot of tutorials and the projects I've been on. To start with, here's a super simple tutorial on using paper bags to make luminaries. A great way to recycle and create décor for your home, parties and events. 

WHAT YOU'LL NEED:
  • A Paper Bag
  • Crepe Paper/Kite Paper in different colours
  • Glue
Step 1: Begin with neatly trimming of the upper part of the paper bag. 
Step 2: Make strips from crepe paper. Use different colours for a colourful & vibrant look.
Step 3: One by one glue the colourful crepe paper strips to the paper bag.
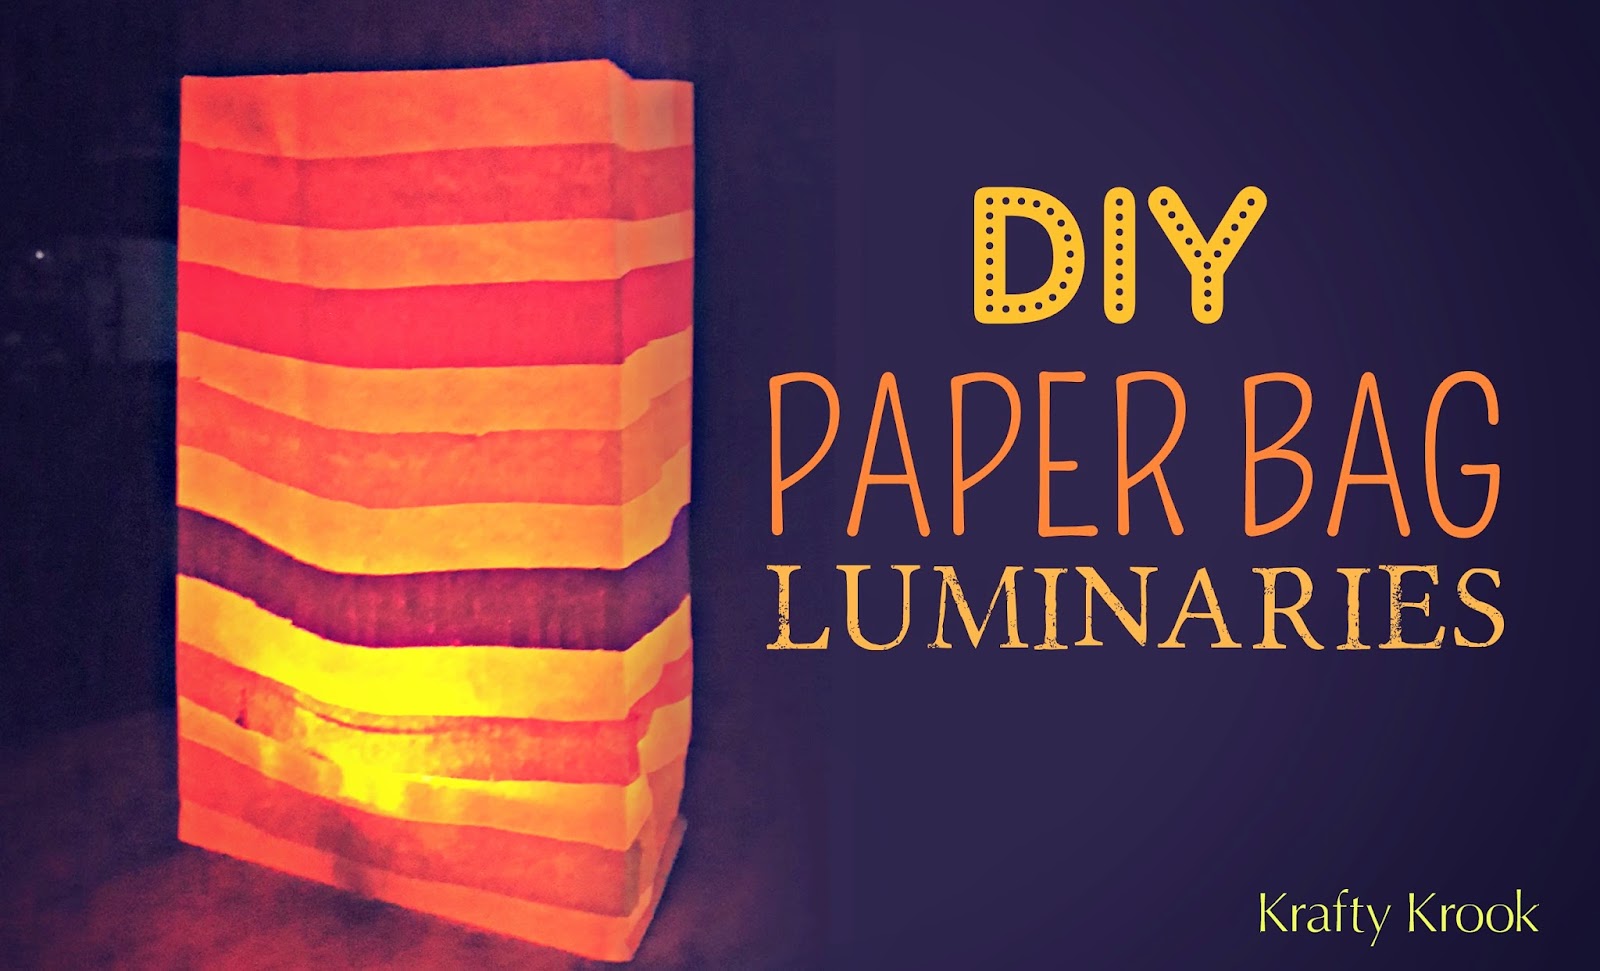
Here's what you're final product will look like. 

Use LED tea lights or place a plain glass votives to light your luminary up. Alternatively, this can be used outdoors using sand  to hold pillar candles.

I hope you enjoy making these! A great alternative to add some quirky element to your home décor/event décor. They're sure going to brighten up all your blues. ;) Try it out!

Next on the blog: Some cute & unique gift tags.

Till then,
Happy Crafting!

Karen 

Friday, 4 April 2014

DIY of the Week: Make Quirky Coasters from Newspapers

Happy Friday People! Hope you all are doing good! I'm in good shape and kicking off this summer with a lot of projects that are going to be up on the blog in the coming weeks. 

I love experimenting with the unused stuff lying around my house. The last time it was a quirky pen stand from newspaper. Based on the same concept are these quirky and colourful coasters made from newspaper. So simple & easy & if you simply love to keep colourful things in your home, these coasters are a must try.
To start off with these, you'll need thin newspaper rolls that we made in the last DIY, some old book covers, acrylic metallic paints & some fevicol. 
Cool isn't it? A super way to convert trash into treasure and what's a better way than using all the newspapers to create such beautiful pieces for your home! 
Hope you've enjoyed today's DIY and I hope you guys enjoy making it too!

Till then,
Have a super duper weekend! And Happy Crafting!

Karen

Wednesday, 4 September 2013

Fun Costers - Recycled from Old Book Covers

Hello people! Hope you all are good! I know its been long - have been tied up with loads of stuff! I somehow managed to sneak out of my busy routine to get this project posted.
Here's a really cool way of recycling cardboard from boxes and book covers! An absolutely fantastic way of turning trash into treasure! And simple too :) 
Here are the book covers used for these coasters!
I had to cut these into squares to make the coasters. For the finishing, I used acrylic paints (both matte & metallic), 3D liners and leaves from my garden to get the leaf stamps. These coasters are with metallic paint leaf stampings.
The back part is done in reverse colours with a metallic paint background and stamping in black. Here are the ones done with plain matte paints.
 The last lot done with 3D liners. 
A real simple and an awesome way to turn trash into treasure!!! So collect all those hardbound book covers and try this out. I'm sure you'll love it! 
My next project is on votives with leaf stamping! Sounds cool? Stay tuned to my blog!

Till then,
Happy Crafting!
Karen

Wednesday, 7 August 2013

DIY: Stationary Organizer from disposable Coffee Cups


When it comes to organising small stationary items it gets really difficult to get all these things together at one place. This is so true especially as far as stuff like pins, paper clips, lead packs, erasers are concerned. Its just too messy to organise things like these. And I'm sure you'll agree with me on this! We do have a lot of options in pen stands but then again it really doesn't serve the purpose. This weeks project is a stationary organiser which works very well for tiny stationary stuff. Made from disposable coffee cups and a box lid, this organiser is sure to solve all the tiny stuff problems!:P
Take a look at the organiser before you check out the tutorial!


Isn't it cool? Well this project is really simple..

TO MAKE THIS, YOU’LL NEED
Disposable Coffee Cups
Box Lid/Cardboard/Covers of an old hardbound book
Metallic Paints
     Coloured Pens & Markers
     Fevicol

Start off with painting the coffee cups with metallic paints on the outside as well as the uppermost part inside and the base on the inside.  Allow the cups to dry.
Take a box lid as the base (You could also use a cardboard piece or a cover of an old hardbound book). Paint it in the colour of your choice and design. In this case, I've used my favourite spiral design on the inside and the sides of the box. Create a similar design on the cups as well.
 The final step is to glue the disposable cups to the base. 
As I said, its a very good and an economical way to create an organiser for your desk as compared to the regular and boring pen stands available in the market. And a great way to recycle! So go ahead, make your own!

Till then,
Happy Crafting!
Karen