Showing posts with label CD's. Show all posts

Tuesday, 25 March 2014

DIY of the Week: Make Quirky Penstands from Newspapers

Hello to all you lovely people. Hope this summers' keeping you good... Its been extremely hot over the last few days in Goa. Thanks to our beaches, we can always have a quick dip to keep off this scorching heat. 
Well getting back to business, I finally got my self started from a long lazy break and back to what I love doing! Here's what I made this weekend and I'm sure you all will love it too. Followed by the picture is a detailed tutorial for the same. Hope you enjoy it!
Being a crafter, I'm always short of pen stands, storage boxes etc etc. I'm sure you'll agree with me on this! And if you're like me, who never likes to purchase such stuff thinking that you can make it by yourself, you're definitely going to end up making things like these. He he he.
I love Newspaper & magazines as craft as art mediums. You can use them in a million of different ways to make amazing stuff. The best part is they're easily available and inexpensive. 
What you'll need for this Pen Stand:
·             Newspaper (Pages cut into Halves)
·      Acrylic Paints ( Normal & Metallic)
·      Ribbon of your Choice
·      An old CD
·      Colored Paper
·      Empty tissue Paper Rolls
·      Fevicol

To Start off, we need to make thin rolls like pipes from newspaper. To do this, we need to take halves of newspaper pages and start rolling it from the corners till you form one thin roll from it. 
Start rolling slowly from one of the corners of the paper and keep rolling it tight till you form a thin roll. Glue the last bit or corner that remains so that the roll remains intact.
Once you're done with this, trim the ends and cut them into sizes as desired for the project. Since we're making a pen stand and I intend to use it for my brushes and scissors, I've just cut the rolls into halves. These are all the rolls I made since my next project too is based on these newspaper rolls.
So we're done with the newspaper rolls. Now we need to make a base for the pen stand so I'm going to use an old CD, some empty tissue paper rolls to make this. Since I love a lot of compartments, I've used 3 tissue rolls to make this pen stand. 
Take any old CD and get it covered by any colored paper of your choice. 
Glue all 3 empty tissue rolls to this base with fevicol. 
Once you're done with this, apply fevicol to all the tissue rolls from outside and also some next to the base so that we can easily glue the thin rolls to the stand. One by one glue the thin newspaper rolls to the stand.
This is what it will look like once you complete gluing all the rolls together.
Now comes the fun part - Colour, enhance and decorate!! Since this has a lot of layers which creates a lot of dimensions, I thought of using a mix of metallic and normal paints inspired by peacock shades. So I started off painting the lower half with some metallic shades and the upper portion with the normal acrylic paints. To complete the look, I got the CD base painted in metallics too.
Here's what the pen stand looks like after being fully painted. I'm so in love with the colours of this pen stand!
For the finishing, tie a broad ribbon around it. I've used a gold one to contrast the colours used on the pen stand.
So that's it with my super-colourful & vibrant pen stand. Making and keeping stuff with colours like these simply makes me happy! 
Well, if you're going to try this out, remember the options are endless. You can use a lot of combinations and there are a million ways to enhance and accessorise it!

I hope you enjoyed this DIY and I hope you enjoy making it too!

Till then,
Happy Crafting! Have a great week ahead!

Karen

Monday, 17 June 2013

DIY: Quirky Coasters from CD's and Price Tags

Hello Folks! Hope you all are good and well! Its been raining cats and dogs over here in Goa over the last few days.  And I prefer to be more of an indoor person during monsoons - enjoying a hot cup of tea along with some hot chocolate cake just out from the oven. And not to talk about some street side masala corn! Yes its one of my monsoon favourites!  That's it from my side.
Getting back to my post on quirky coasters, here's a super way to recycle all the Cd's as well as price tags in your home. And you won't believe it, they simply add a happy and homely feel to any table! Well, here are a few snapshots before I go about telling you how to make them...
The First Six are Cd's and the next 6, Price Tags.
 Aren't they simply pretty??? In my own words, they simply add an 'awwww' factor to a table. 

So here's how you got about it... You can try these coasters with Cd's or Price tags. The technique is the same. 
For those of you using price tags, if you're a regular shopper at pantaloons, there's this brand in salwar/Kurtis called "Rangmanch" which usually has its price tags in the form of circles. This is what I've used for the coasters. 
Getting Started with your coasters:
·      Get your CD/Price tag painted in acrylic colours. Chose your colour depending on the colour of the thread your using. So keep it contrasted to make these coasters more colourful.  For e.g. if you're using a green or an orange coloured thread, paint the CD/price tag in black. 
·      For the thread, you can use any type of thread except for wool. 
·      Apply a little bit of fevicol to the CD/price tags, especially at the edges for it to hold the thread and for a durable finish.  
·   Start rolling the thread over the CD/price tag carefully. Make sure the first layer is strongly glued to the CD/price tag. Roll the thread in a way which creates a lot of geometric designs. :) (That's the simplest way I could put it! :D)
·      Finally, wind up by gluing the last end of the thread with fevicol. Make sure you use a decent amount so that it doesn't come off later. And you're done with your coaster!

If you do try out, Don't forget to share your pictures over here. I would love to feature them in my blog.

Till then,  Happy Crafting!!
See you next week.
Karen

Thursday, 2 May 2013

Junk'd - Pen Stands from Beer Cans and Old CD's


Hello there! Hope you all have been good :)
Last time I had talked about the Multi utility stands from newspaper & old magazines. This post is an extension to it; the only difference being that these pen stands are made from beer cans, old CD's and some jute twine.
Yes, I love to use old scratched CD's for my projects since they simple make a great option as a base to my pen stands. And of course, I would love to experiment more with the CD's stacked in my house. I'm sure there'll be numerous ideas to turn them into something useful. 
Well here are few snapshots of the pen stands I've made recently:
You can make your own pen stands using beer cans or even juice/cola cans. There's a lot you can do with it and lot of ways to make them. Other alternatives to jute twine:
- Use newspaper strips
- Use Paper Tape
- Left over fabric pieces
- Lace borders
And lots more. Use your own imagination and creativity. 
So what are you waiting for, go ahead and make your own quirky pen stands. 

Till then, Happy Crafting!
Karen 


Tuesday, 22 January 2013

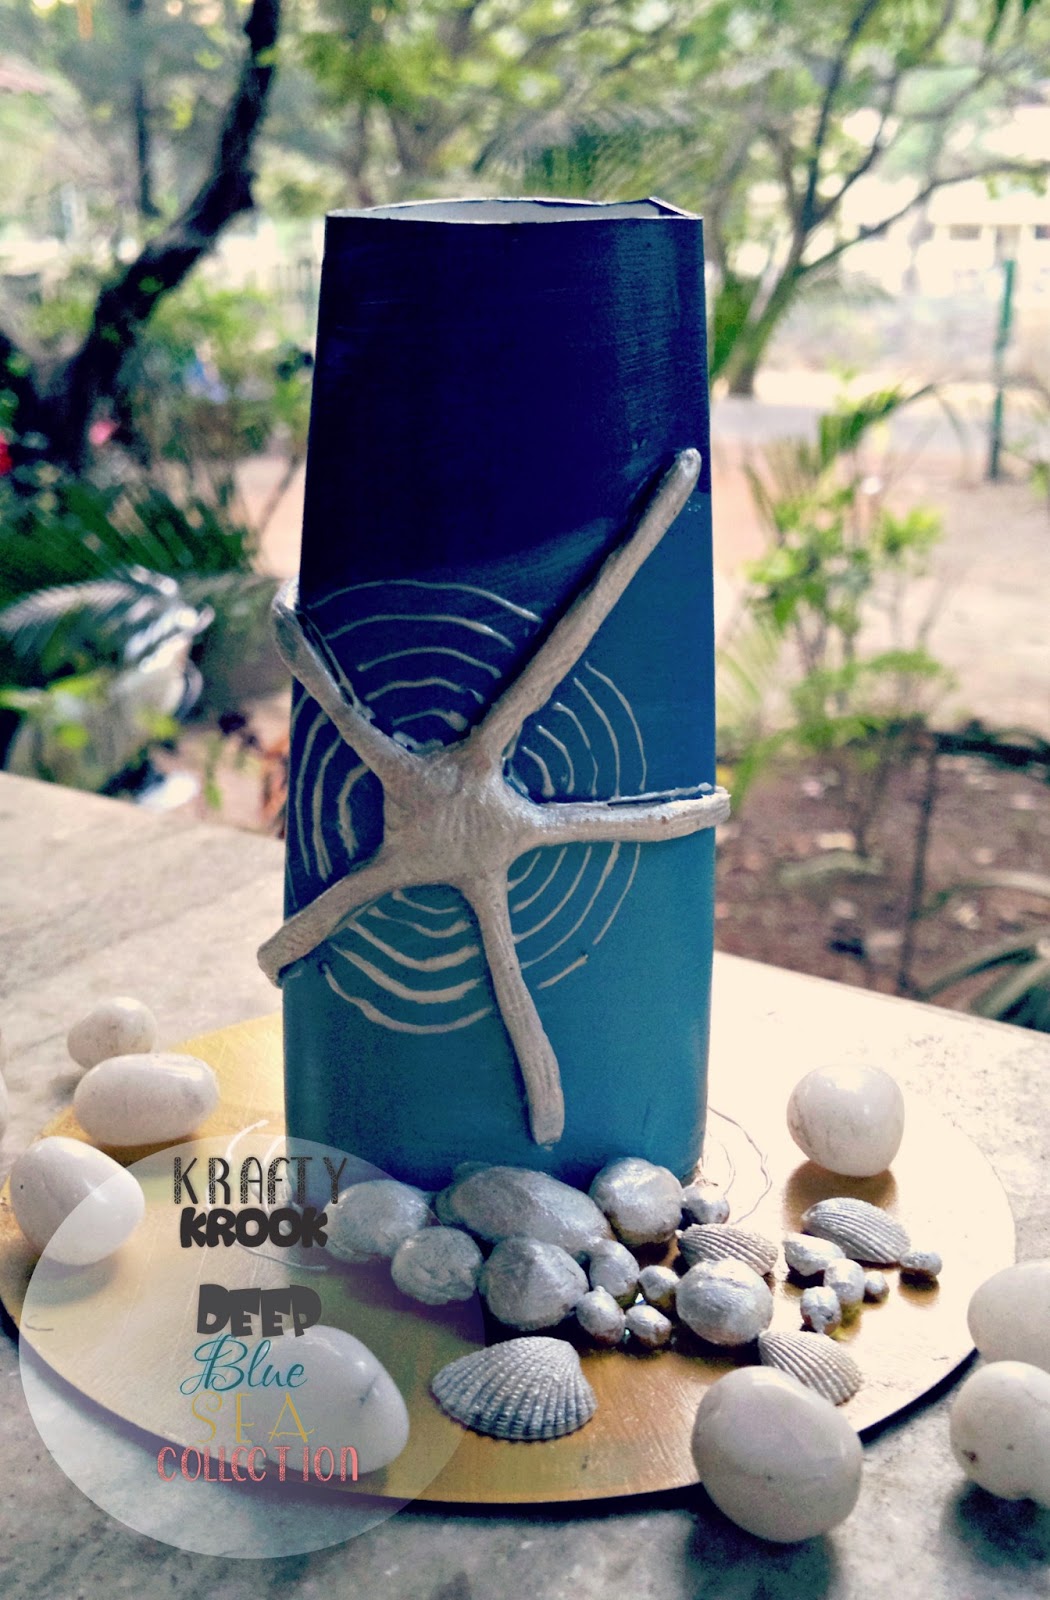
The Deep Blue Sea Collection - Amazing Home Decor made from Junk!

First of all, wishing you guys a very happy new year! We’ve got another set of 365 days filled with unexpected surprises, inspiration and challenges. So may we all be blessed with the best of creative spirits to rise up to the best!

So to start off with this brand new year, here’s Krafty Krook’s new collection comprising of pen stands, coasters and candle votives. And yes, again all made from junk items except for the votives (made from the ordinary ones available in the market).

Well, I must admit that I’m a total sea-freak and I adore every single thing associated with the sea and blue waters. Being a Goan, it comes naturally to me! He he… Talking about the ‘deep blue sea’ collection - its totally inspired by the elements of the seaside – the aqua blue sea, cool sea breeze, the golden sand, cute starfishes, tiny pebbles and lots more. Here's the entire bunch:


Quirky Sea inspired Pen Stands
Made from old CD's, empty shampoo bottles. Accessories made from crafter's clay
Medium sized pen stand with gold embellishments
Medium sized pen stand with silver embellishments
Large sized pen stand with silver embellishments

 Quirky Sea inspired Table coasters
Made from old CD's and thick Jute twine

    Elegant Sea inspired candle votives

Made from ordinary shot glasses available in the market. Hand painted and embellished with handmade fancy paper.
Hand painted shot glasses to serve as candle votives
Lit up with LED candles
Believe me, you can make amazing stuff out of junk! We just need to put our creative minds together, hunt and be open to experiment! And this is just a part of it all... there much much more, much beyond our imagination!
Do stay tuned for the tutorial on my quirky sea inspired pen stands.

Till then, Happy Crafting

Karen

Monday, 27 August 2012

Turning Junk Items Into Pen Stands for your Desk!


A great idea for those who love experimenting with Junk and throw-away items. I had a lot of stuff lying around the house especially old CD's, leftover toilet paper roll cardboard (had kept it in just in case I want to make something out of it) and some old boxes, which i knew I would use someday. 


With limited time and materials at hand, I managed to pull off 3 pieces. The first one is a pen stand made out of an old plastic bottle. What I've used for this piece:
  • Old CD (as the base)
  • Plastic wine bottle (for the pen holder), cut into half to get a wide mouthed stand.
  • Fine jute twine,lace and some ribbon ( for decorating the pen stand)
  • Acrylic Paint ( to paint the base)
  • Glue - I've used Fevibond & Fevicol in this case. Fevibond - to stick together the stand and the base (since its a stronger glue base) and fevicol - to stick the twine around the stand.
The skeleton:
Twirled with a fine jute rope and decorated with a strip of lace and a red ribbon, this surely makes a cute and a rustic piece for the desk. 
The final product:

The second one is a piece made out of the leftover cardboard from the toilet paper roll. What I've used:
  • Cardboard from the toilet paper roll (as the stand)
  • Old CD (as the base)
  • Colored Paper twine, Felt paper roses (for decorating the stand)
  • Acrylic Paint (to paint the base)
  • Glue base - same as the first one.
The skeleton:
The CD base is painted with a similar color as the paper twine so that I could use a contrast for the extras... 
The Final Product:

A cute little piece to add some color to your desk!

The last one is a piece made from leftover cardboard of an old shoe box. Its texture is such that's it easy to fold in and play with shapes in different ways. What I've used:
  • Cardboard from a shoe box (as the stand)
  • Old CD (as the base)
  • Jute Twine, Oval shaped colored stones (for decorating the stand)
  • Acrylic Paint (to paint the base & the stand). In this case I've also used metallic acrylics for the base.
  • Glue base - same as the first one.

The cardboard is folded in cylindrical shape to serve as a stand. 
The Skeleton:
I got the twine coiled on the CD base to give a more rustic feel to it.
and the stand painted in a vibrant purple color. The base is painted with a gold metallic color. 
Finally, decorated with twine and some colored stones, this is what the final piece looks like... Love the way the colors have turned out! 
The final product:


A very cheap and an Eco-friendly way to make stuff for the home or your office space. If you have a lot of junk stuff lying around, this would be a best way to get rid of it! Yeah! I mean in a creative way! 

Karen